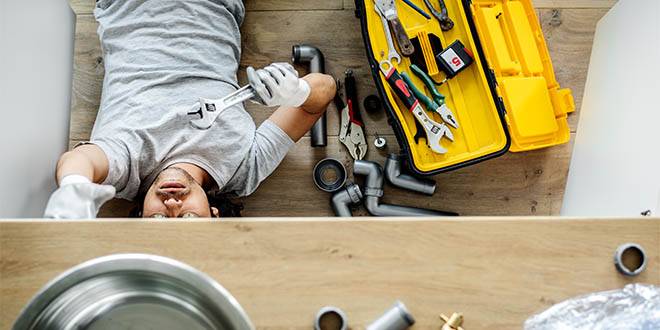
Home and business owners in Bridgewater, NJ, know that plumbing issues can arise unexpectedly. Understanding the most common plumbing repairs can save you from headaches and costly damage. Let’s dive into what to watch out for and how to address these challenges!
Dripping Faucets ????
Why Faucets Drip
The most common reason a faucet begins to drip is due to wear and tear on its internal components, specifically the washers and O-rings. These parts form a seal preventing water from passing through the faucet when it is turned off. Over time, these components can degrade or become misshapen due to constant pressure and exposure to water. This degradation breaks the watertight seal, allowing small amounts of water to seep through, resulting in a drip.
- Washers: These are typically made of rubber, which can wear out over time, especially if the faucet is used frequently.
- O-rings: These rings provide a secondary seal within the faucet’s structure. They can also wear out or break, which can lead to dripping.
Consequences of Ignoring a Dripping Faucet
While it might seem inconsequential, a dripping faucet can lead to significant water wastage. A faucet that drips once per second can waste over 3,000 gallons of water per year, which not only impacts the environment but also drives up your water bill. Additionally, the constant presence of water can cause water damage to your fixtures and surfaces and may encourage the growth of mold and mildew, which can pose health risks and require costly remediation efforts.
How to Fix a Dripping Faucet
Fixing a dripping faucet often involves replacing the worn-out washer or O-ring, a task that most homeowners can undertake with basic tools:
- Turn Off the Water Supply: Before you begin any repair, make sure to turn off the water supply to the faucet. This is typically done via the shutoff valves under the sink. Turn the valve clockwise to close.
- Remove the Faucet Handle: You’ll usually need a screwdriver or an Allen wrench to remove the handle. In some models, the screw is hidden under a decorative cap that you need to pry off.
- Replace the Washer or O-ring: Once the handle is off, you’ll see the stem or cartridge. The washer or O-ring is located at the bottom of the cartridge for compression faucets or around the cartridge for cartridge-type faucets. Remove the old washer or O-ring and replace it with a new one that matches in size and type.
- Reassemble the Faucet: After replacing the worn part, reassemble the faucet and turn the water supply back on. Check to see if the drip has stopped.
- Test Your Work: Once everything is back together, turn the faucet on and off a few times to ensure there are no leaks.
When to Call a Professional
If replacing the washer or O-ring does not solve the problem, or if you are uncomfortable performing the repair yourself, it might be time to call a professional plumber. There could be less obvious issues such as a worn valve seat or damage within the faucet body that requires specialized tools and expertise to fix properly. Professional plumbers can also offer long-term solutions and advice on whether a faucet repair or a full replacement is more cost-effective, considering the age and condition of your fixtures.
Leaky Pipes ????
How to Spot Leaky Pipes
Detecting leaks early can be crucial in preventing significant water damage. Here are some tips to identify leaks in your home:
- Wet Spots: Regularly check areas around your home for unexplained wet spots on floors, walls, or ceilings. This is often the most visible sign of a leaking pipe.
- Bulging Wallpaper or Paint: Water from a leak can seep into wall coverings and cause them to bubble or peel. If you notice any bulging, peeling, or discoloration of wallpaper or paint, it could be a sign of a leak behind the wall.
- Musty Smell: Persistent dampness from a hidden leak can lead to mold and mildew growth, which produces a distinct musty odor. If part of your house smells musty and you can’t identify the source, it might be a hidden leak.
- Frozen Pipes: In colder months, exposed pipes can freeze and burst, leading to sudden and severe leaks. Look for frost on the outside of pipes or a lack of running water, which can indicate a frozen pipe.
How to Fix Leaky Pipes
Once you’ve identified a leak, addressing it quickly is essential. Here are some steps you can take to fix leaky pipes:
- Tighten Connections: Sometimes, leaks result from loose fittings or connections. Use a wrench to gently tighten any connections where there is dripping. Be careful not to overtighten, as this can damage the fittings.
- Replace Damaged Sections: If a specific section of pipe is damaged and causing a leak, it may need to be replaced. For accessible pipes, like those under sinks, you can usually do this yourself with some basic plumbing tools. Cut out the damaged section and replace it with a new piece of pipe and appropriate fittings.
- Insulate Pipes: To prevent freezing and bursting in cold weather, insulate your pipes. Pipe insulation sleeves are easy to install and can be an effective preventative measure against cold weather-related leaks.
- Use Epoxy: For small leaks, especially in areas that are not under high pressure, you can use waterproof epoxy to seal the leak. Clean the area around the leak thoroughly, apply the epoxy, and let it cure according to the manufacturer’s instructions.
When to Call a Professional Plumber
While some leaks can be fixed with DIY methods, others require professional intervention, especially if:
- The location of the leak is not easily accessible, such as behind walls or under the foundation.
- The leak is extensive, or there are multiple leak points.
- You’re not comfortable performing the repairs yourself or the initial fixes do not stop the leak.
Running Toilets ????
Common Causes of a Running Toilet
Most often, the problem with a running toilet is due to issues with the flapper valve, the fill tube, the fill valve, or the flush valve. These parts are crucial for the proper functioning of the toilet, as they control the flow of water into and out of the tank:
- Flapper Valve: This is a rubber seal that sits at the bottom of the tank. It lifts when you flush the toilet, allowing water to flow from the tank into the bowl. If the flapper is worn, warped, or damaged, water will continuously leak from the tank into the bowl, causing the toilet to run.
- Fill Tube: This small tube directs water into the overflow tube in the tank to refill the bowl. If it’s improperly connected, it can affect how the tank fills, potentially leading to a running toilet.
- Fill Valve: This controls the water level within the tank. If it fails, it can cause the tank to overfill, which leads to continuous running.
- Flush Valve: This assembly includes the flush valve seat, which the flapper valve seals against. If this seat is damaged, the toilet may run continuously.
Steps to Fix a Running Toilet
- Check the Flapper Valve:
- Shut off the water supply to the toilet.
- Flush the toilet to drain the tank.
- Inspect the flapper. If it’s brittle, warped, or damaged, it needs to be replaced.
- To replace the flapper, unclip it from the overflow tube and unhook the chain. Attach the new flapper, re-hook the chain with minimal slack, and clip it back onto the overflow tube.
- Inspect the Fill Tube:
- Ensure the fill tube is firmly attached to the fill valve and directs water into the overflow pipe without any leakage.
- If the tube is loose, reattach it securely. If it’s damaged, replace it with a new tube.
- Adjust the Fill Valve:
- If the water level in the tank is too high and spilling into the overflow tube, it can cause the toilet to run.
- Adjust the fill valve so the water stops filling about one inch below the top of the overflow tube. This adjustment can usually be made by turning a screw or sliding a clip along a rod.
- Examine the Flush Valve:
- Look for signs of wear or damage to the flush valve seat. If it is cracked or has mineral deposits, it may need to be cleaned or replaced.
- Replacing a flush valve is more complex and may require removing the toilet tank.
When to Call a Professional
While many issues with a running toilet can be fixed with DIY methods, if you’ve tried the above steps and your toilet continues to run, it may be time to call a professional plumber. They can provide a thorough diagnosis and handle more complicated repairs or replacements that might be out of reach for typical home repair skills.
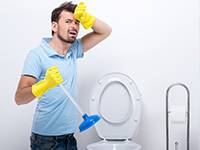
Clogged Drains and Toilets ????
A clogged drain or toilet is one of the most common and annoying issues faced in households. These blockages can significantly disrupt daily life and, if not properly managed, lead to messy overflows and potential water damage.
How to Fix:
- Use a Plunger: This is the first tool you should reach for when dealing with a clog. Ensure you have a good seal around the plunger and use a forceful up-and-down motion to help dislodge the blockage.
- Plumber’s Snake (Drain Auger): For clogs that are deeper within the pipes, a plumber’s snake can be effective. This tool can navigate the bends in the pipes and physically remove blockages that are unreachable by a plunger.
- Hydro Jetting: This method uses high-pressure water to clear out clogs and is usually performed by professionals. It’s especially effective for severe blockages and for cleaning the insides of pipes.
- Avoid Chemical Drain Cleaners: While they might seem like a quick fix, chemical cleaners can cause long-term damage to your pipes by corroding them, which can lead to leaks and other plumbing issues.
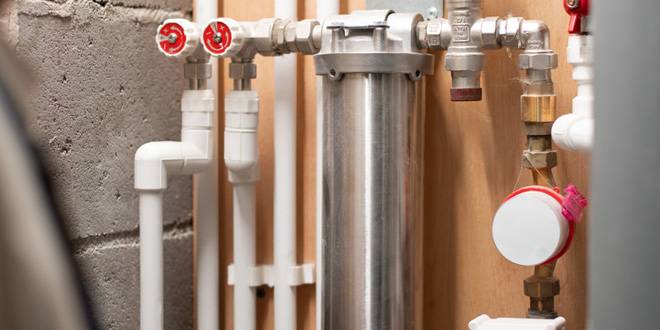
Water Heater Issues ????
A lack of hot water can affect everything from your morning routine to your dishwashing capabilities. Various issues can impair a water heaters performance, typically involving the thermostat, heating elements, or sediment buildup.
How to Spot:
- Inconsistent Water Temperature: If your water heater is failing, you might notice fluctuations in water temperature or it may take longer than usual for the water to heat up.
- Running Out of Hot Water Quickly: This often indicates a failing heating element or an issue with the thermostat.
- Strange Noises: Rumbling, popping, or whining noises can be a sign of sediment buildup which makes heating less efficient and can overheat the bottom of the tank.
- Visible Leaks: Any moisture or pooling water around the base of the water heater should be addressed immediately as it can indicate a leak or a crack in the tank.
How to Fix:
- Thermostat Adjustments: Sometimes, the issue may be as simple as the thermostat being set too low. Adjusting it might resolve the problem.
- Heating Element Replacement: If adjusting the thermostat doesn’t help, the heating element may need to be replaced—a task best left to professionals.
- Flush the Tank: Annually flushing out the tank can help remove sediment buildup and increase efficiency.
Sump Pump Failures ????
Sump pumps are critical in areas prone to flooding, as they help keep water away from your home’s foundation and prevent basement flooding.
How to Fix:
- Regular Testing: Pour a bucket of water into the sump pit to simulate rising water. This should trigger the pump. If it doesn’t, there may be a problem.
- Check the Outlet: Ensure the pump is plugged in and the circuit breaker hasn’t tripped.
- Inspect for Debris: Make sure the pump’s intake and the discharge line are free of obstructions. Debris can prevent the pump from operating correctly.
- Listen for Unusual Noises: Strange noises coming from the pump can indicate mechanical issues or obstructions.
When to Call a Professional:
For any issues with sump pumps that can’t be resolved through simple checks and maintenance, or if the system requires a part replacement or a complete overhaul, professional help is crucial. An expert can ensure that the pump is ready for heavy rain and extensive use, securing your home against potential flooding.
While some minor repairs can be handled with a few tools and a little know-how, recognizing when to call a professional can save you time and prevent potential mishaps. Regular maintenance and addressing small issues quickly can keep your plumbing in top shape and prevent the need for emergency calls.
Your Bridgewater Plumbing Partner
Stay ahead of common plumbing system issues with our expert tips, and remember that for those times when DIY just won’t cut it, Supreme Heating and Air Conditioning is here to help. Our team of professionals is ready to tackle any challenge, from leaky faucets to water heater replacements, ensuring your home or business runs smoothly.

Protect Your Plumbing with Supreme!
Don’t let common plumbing issues throw a wrench in your day! Call Supreme Heating and Air Conditioning for swift, professional service in Bridgewater, NJ. From routine maintenance to emergency repairs, we ensure your plumbing problems are solved efficiently. Trust us to keep your water flowing perfectly. We also offer comprehensive HVAC services. Call today and experience the Supreme difference!